Introduction
Use this guide to replace your Honda Accord's distributor rotor. This specific guide was created for a non-VTEC F23A5 engine, but other 4-cylinder Honda engines will be similar enough to follow the same basic steps. You may have to remove the engine cover in later Accord models.
-
-
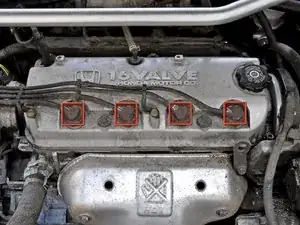
Before disconnecting the spark plug wires, be sure to trace their orientation from the individual cylinders back to the distributor cap.
-
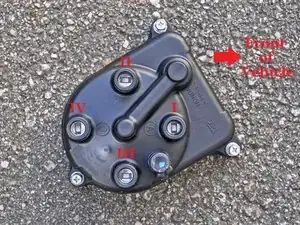
The cylinders are ordered from left to right when viewing the engine from the front of the car, with cylinder #1 being closest to the passenger side of the vehicle.
-
-
-
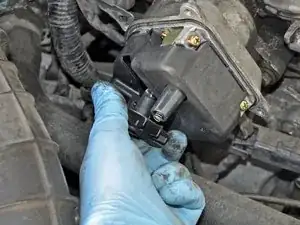
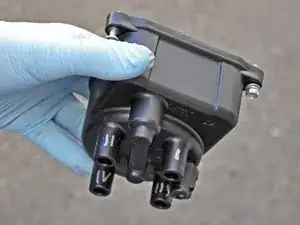
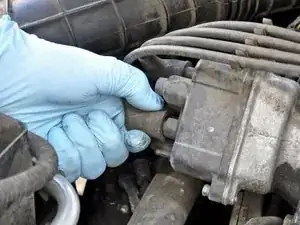
Disconnect the four spark plug wires from the distributor cap by pulling their connectors straight away from the sockets on the distributor cap.
-
-
-
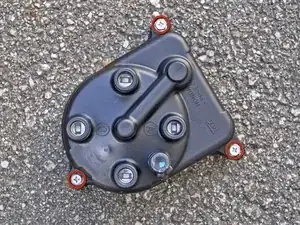
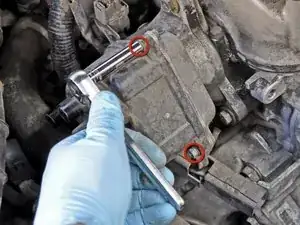
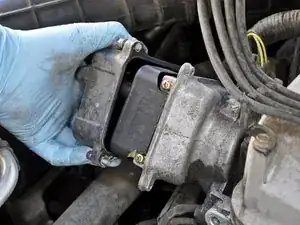
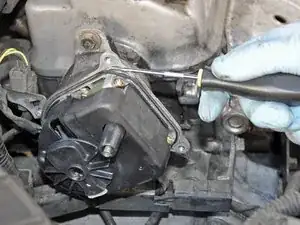
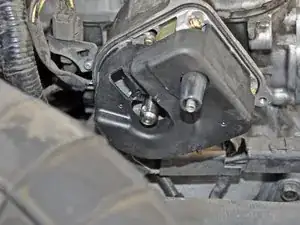
Use a 1/4" drive, 8 mm deep socket to remove the three hex bolts securing the distributor cap to the engine.
-
-
-
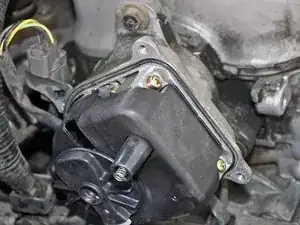
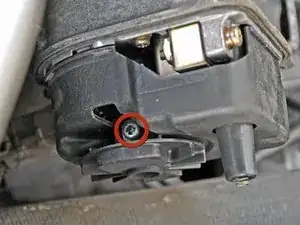
Use a dental pick or a small screwdriver to gently remove the D-shaped o-ring around the distributor cap flange.
-
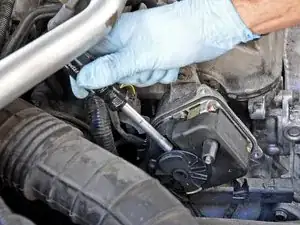
Install a new o-ring in the seal recess, making sure that it is sitting flush against the flange.
-
-
-
Pull the distributor rotor straight off its shaft, being careful not to rotate the shaft as you remove it.
-

To reassemble your device, follow these instructions in reverse order.

5 comments
In Step 6, the Phillips screw holding the distributor rotor in place is stuck and it won't turn for me. Any advice on removing that screw, when it is stuck in place? This is on a 1997 Honda Accord LX, non VTEC. Thanks...
Get a punch screwdriver. It's a tool that as hit the top it twist. Be care full not to hit to hard. Or if u can fit a angle die grinder cut one line through top part of screw. Use a big flat head screwdriver. Do not cut top of bolt too deep stop right before u get to the bottom of the head of bolt
dbo240 -
The screw attaching my rotor is missing. 2001 crv do you know the size?
Trish -
There is a problem with the order, the first cylinder is on the right not on the left, always next to the timing pulley, the numbering is opposite.
But following your reflection it is and all the same good
Denis bache -